Creating landing pages
NAVIGATION Left navigation menu > Settings ![]() > Pages
> Pages
SECURITY Standard, Sales, and Purchasing roles cannot have the settings check box selected - only admin users can access settings.
Custom Online Store landing pages are useful resources for sharing specific information with your organizations. You can create web pages within Kaseya Quote Manager to do the following:
- Explain your services.
- Communicate the benefits of products, offer bundles, and make special offers.
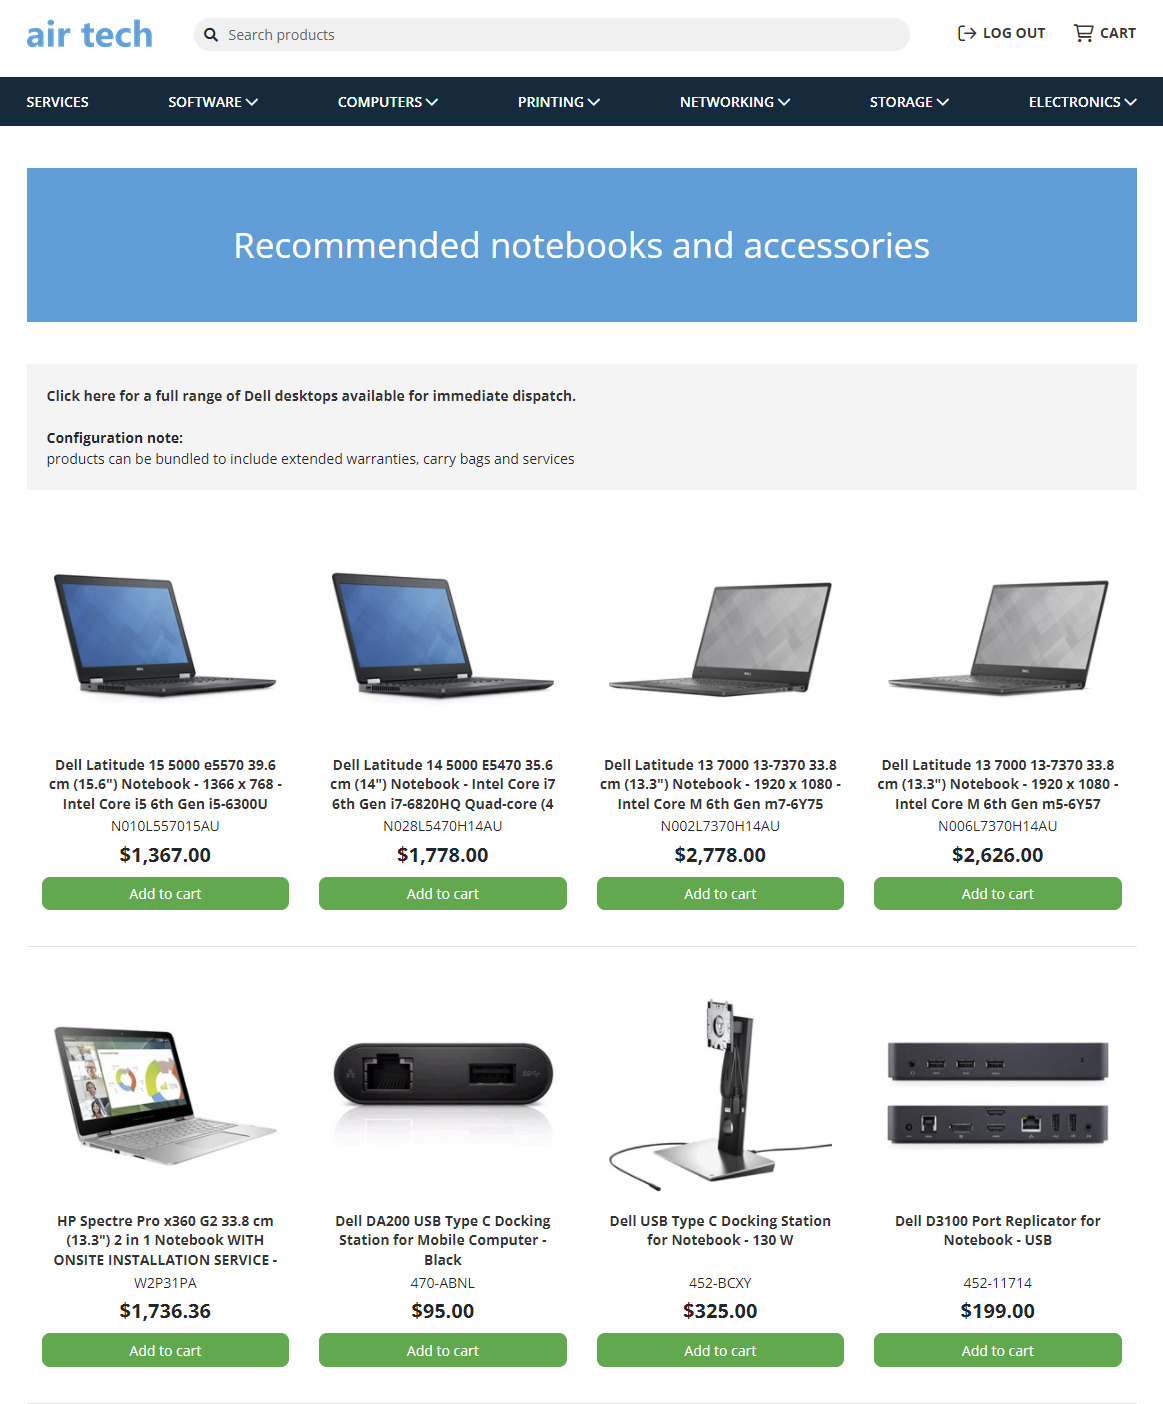
- Display online catalogs and feature specific products.
- Promote certain suppliers.

You can share these web pages privately with special organizations or link them publicly from your Online Store.
Example landing page:

You don't need to manually create a portal for your organizations to use your site. Simply invite them to access your general Online Store. Refer to Inviting your organizations in Setting up your Online Store.
However, you can create an organization-specific landing page to share a dedicated product catalog or exclusive offers. For an added touch, feature the organization's business logo and other personalized details.
Even on custom landing pages, product pricing changes automatically based on the viewer's login, reflecting price group discounts, bid pricing, or quoted pricing (if higher than bid price).
See an example of a simply designed organization landing page template and download the HTML.
To learn how to send a landing page to a specific organization or select group of organizations, refer to Share a landing page privately.
How to...
- From the left navigation menu, click Settings
 > Pages > Add page.
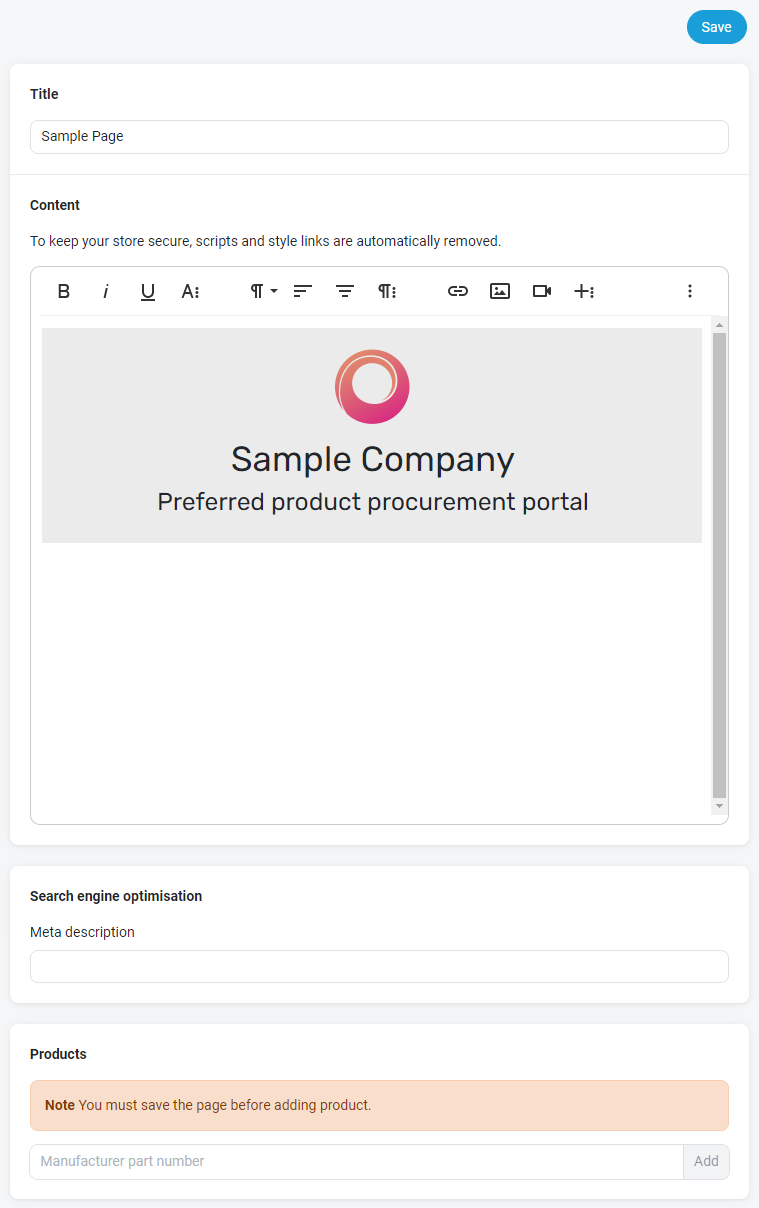
- Enter a clear Title for the page. When the page is open, the title appears in the web browser tab.
- Create or paste Content for the body of the page using the Basic HTML editor.
- While editing, we recommend you Save your progress often and reopen the page to continue editing.
- Optionally, enter an SEO Meta description to enhance your website's Google rankings.
- Click Save.
Proceed to the next section to learn how to add products to the page.
The following table describes each tool available in the basic HTML editor, which you can use to create custom web page content:
| Group of controls | Description |
|---|---|
|
Text styling |
Bold, italicize, or underline text. Click the More Text icon
|
|
Paragraph formatting |
Change the paragraph format or text alignment. Click the Paragraph Format icon
Click the More Paragraph icon
|
|
Rich media |
Insert an image, video, or table among text. Click the More Rich icon
NOTE You may wish to add a link to a landing page you created or to a file you uploaded in Kaseya Quote Manager. Refer to Creating landing pages and Uploading files. |
|
More Misc options
|
Click the More Misc (three dot) icon |
|
Undo / Redo |
Undo or redo your latest edit. You must click the More Misc (three dot) icon |
|
Select All |
Click to select all of the text. This option is useful for applying a style to all text at once. You must click the More Misc (three dot) icon |
NOTE Offline products are visible when added to any landing page or quote. Therefore, we recommend taking offline any SKUs that are unique to a certain organization. To learn how to do so, refer to Online store in Adding and managing products and services.
After saving a created landing page at least once, you can add products to it as follows:
- In the Products section, enter a Manufacturer Part Number (MPN).
- Click Add to add the product to the page.
- Repeat the process to add additional products.
- In the upper-right corner of the page, click Save to save the landing page with the new product(s) added.

NOTE Products appear as a listing below any HTML content, including all product details and the Add to cart button. Add products in the sequence of listing desired. The first entered is listed first.
- From the left navigation menu, click Settings
 > Pages.
 - Click the Title of the page to open the editor.
- To preview the web page in a new tab of your browser, click View in the upper-right corner of the page.
- Close out of the page to return to the editor and make any desired changes.
- If you make changes, remember to click Save.
While the URL for any landing page you create is public on the web, you have the option to share it privately. An organization is unlikely to find the page via search engines or your Online Store without the URL. Further obscure the URL by adding the organization account number to the page Title.
Share a landing page privately as follows:
- From the left navigation menu, click Settings
 > Pages.
 - Click the Title of the page you want to share.
- In the upper-right corner of the page, click View.
- In the new tab that opens, copy the landing page URL.
- Paste the URL anywhere you would like to share it, such as in a message through Mailchimp or a direct email.
Link a page in the footer of your Online Store:
From the left navigation menu, click Settings ![]() > Links. See Linking to a landing page in Managing footer links for instructions.
> Links. See Linking to a landing page in Managing footer links for instructions.
Link a page in a home page slideshow:
From the left navigation menu, click Settings ![]() > Theme and navigate to the Slideshow section. See Slideshow in Creating landing pages for instructions.
> Theme and navigate to the Slideshow section. See Slideshow in Creating landing pages for instructions.
- From the left navigation menu, click Settings
 > Pages.
 - Click the Title of the page you want to share.
- In the upper-right corner of the page, click View.
- In the new tab that opens, copy the landing page URL.
- From the left navigation menu, click Products
 > All Products.
 - Search for a product and click its MPN to open the product detail page.
- Navigate to the Description section and click the Insert link icon
 in the content editor toolbar to add a link to the landing page.
 - Enter the display text for the hyperlink in the Text to display text box.
- Paste the landing page URL in the To what URL should this link go? text box.
- Click Insert Link.
- In the upper-right corner of the page, click Save.
When creating or editing a landing page, click the Insert link icon ![]() in the content editor toolbar to add a link to another landing page. Refer to Basic HTML editor.
in the content editor toolbar to add a link to another landing page. Refer to Basic HTML editor.
EXAMPLE A master landing page could list main product categories, which in turn link to a dedicated landing page for each category. See an example and download the HTML for the template.
- From the left navigation menu, click Settings
 > Pages.
 - Click the Title of the page to open the editor.
- In the upper-right corner of the page, click Delete.
- Click Delete page to confirm the deletion.


