Creating and managing organization accounts
NAVIGATION Left navigation menu > Organizations ![]()
Add your organizations to Kaseya Quote Manager, invite them and their staff to use your Online Store, and take advantage of the multiple tools available for managing their individual accounts.
Once you configure their accounts, we encourage you to share these Online Store instructions with your organizations: Online Store instructions for organizations.
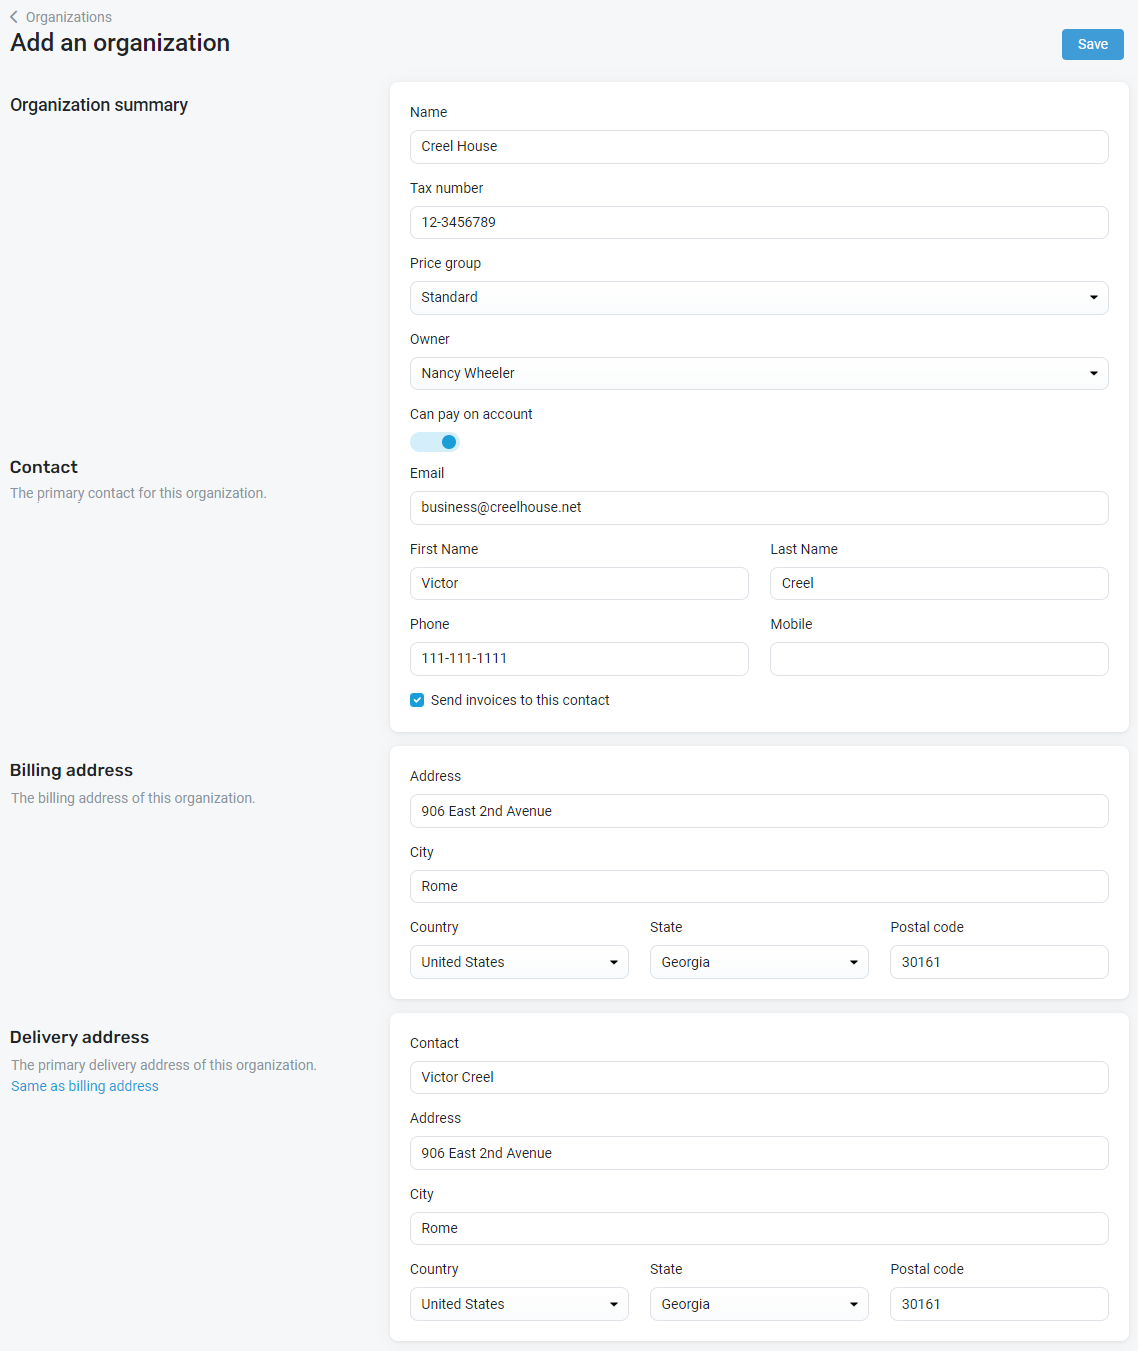
The following table outlines the information you can add and maintain in an organization's account:
| Field name | Description |
|---|---|
| Organization summary | |
| Name |
Enter the organization's name. |
| Tax number |
Enter the organization's tax number. |
| Price group |
Select the pricing you want to offer this organization, either standard pricing or one of your group discounts. NOTE To learn how to set the margins for your group discounts, refer to Set organization group discounts in Setting pricing. |
| Owner |
Optionally, assign the organization to an account owner from your Kaseya Quote Manager team. Account ownership is useful for your reporting when it comes to evaluating sales and quoting performance. NOTE The account owner is different from the sales order owner (the staff account that enters an order) and the quote owner (the staff account manually assigned as a quote's owner). NOTE To learn how to add Kaseya Quote Manager internal users to designate as owners, refer to Creating and managing staff accounts. |
|
Can pay on account |
Turn on this toggle to allow the organization to make purchases in your Online Store on their account. NOTE To learn how to enable account payments on your platform, refer to Enable organizations to pay on account in Enabling payments. |
| Contact | |
| Email, First Name, Last Name, Phone, Mobile |
Enter the primary contact information for this organization. If needed, you can add additional contacts later on. Refer to Add additional organization contacts. |
|
Send invoices to this contact |
Select this check box if you would like this primary organization contact to automatically receive an invoice or sales order notification upon purchases. |
| Billing address | |
| Address, City, Country, State, Postal code |
Enter and select the billing address details for this organization. |
| Delivery address | |
| Contact, Address, City, Country, State, Postal code |
Enter and select the primary delivery address details for this organization. To copy the billing address as the delivery address, simply click Same as billing address. |
How to...
Import and sync organizations via your Autotask or ConnectWise PSA integration.
Alternatively, contact the Kaseya Quote Manager support team to arrange importing an organization list from a CSV file.
- From the left navigation menu, click Organizations
 > Add organization.
 - Fill out initial information about the organization, as explained in the preceding table.
- In the upper-right corner of the page, click Save. The new organization now appears in the listing on your Organizations landing page.


You will have added one primary organization contact upon initially creating an organization account. Add any number of additional contacts as follows:
- From the left navigation menu, click Organizations
 .
. - Search for the organization for which you want to add a contact and click their Organization # to open their detail page.
- In the Contacts section, click Add.
-
Enter the contact information.
-
Select the Send invoices to this contact check box if you would like this organization contact to automatically receive an invoice or sales order notification upon purchases.
-
In the upper-right corner of the page, click Save.

NOTE You can configure multiple contacts using the same email address. When an organization logs in to an account registered against multiple organization contacts, the Online Store defaults to the earliest-created organization contact information.
The following instructions describe how to invite organization contacts one by one from the Admin Center Organizations ![]() page. To learn how to send a mass invitation to multiple organizations at once via an Electronic Direct Mail (EDM) application, refer to Sending group invitations.
page. To learn how to send a mass invitation to multiple organizations at once via an Electronic Direct Mail (EDM) application, refer to Sending group invitations.
- From the left navigation menu, click Organizations
 .
. - Search for the relevant organization and click their Organization # to open their detail page.
- In the Contacts section, navigate to the organization contact you want to invite. Ensure that the contact email address is correct.
- Click Send invite. The contact will receive an email invitation to create an account for your Online Store.

NOTE In this section, you can view the timing of each contact's latest login or latest invitation. Invitations expire after one week. After you send the initial invitation, the button changes to a Resend invite option.
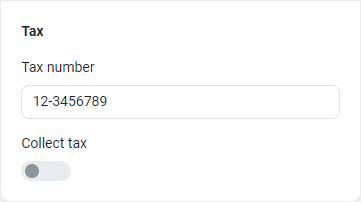
To disable tax collection upon checkout for any organization , complete the following steps:
- From the left navigation menu, click Organizations
 .
. - Search for the organization you wish to make tax exempt and click their Organization # to open their detail page.
- In the Tax section, turn off the Collect tax toggle.
- In the upper-right corner of the page, click Save.

Open a ticket with the Kaseya Quote Manager support team that includes the details of your request to merge organization accounts.
It is not possible to delete organization accounts in Kaseya Quote Manager. Doing so would result in the loss of their transaction history. However, consider modifying the name of an organization to indicate their inactivity (for example: adding the word "inactive" to their name).


